This post will show you simple steps in using Parties and RoleLinks to dynamically route a message to a different destination.
Example Scenario:
Consider you receive a message from some sources. This message has a node called Name. Based on the value of Name node, you have to route the message to that party. Each party saves the message to a different folder using FILE Adapter.
Sample:
1. Create an empty BizTalk Solution. Add a schema with two nodes ID and Name. For simplicity make both nodes as Distinguished Fields.

2. Add an orchestration to the solution and a receive Shape to it, to receive a message of the Type Schema1 created in step-1.

3. Right Click the Port Surface and add a new RoleLink to it.

4. Follow the Wizard. Give the RoleLink a suitable name and Create a new Role Link Type. In the Last Step, select the Consumer Role (I will be sending the First Message).

5. From the resultant RoleLink, delete the Consumer Role. Right Click the Consumer Role and select Add Port Type.

6. In the Port Type Wizard, select the communication Pattern as One-Way and Access Restriction to Public. Complete the Wizard.
7. Now we should add a line of code, to indicate how to determine the Destination Party to which the message should be routed.
Add an expression shape to the orchestration and put the following code in that.

Keep note of “SomeId”. This is the identifier that the part should have to route the message to it. We will use this back in Admin Console.
8. Add a Send Shape to the Orchestration and Send the Input Message (received in step-2) to the Role Link. Resulting Orchestration will be as follows.

9. Sign the solution and deploy to Admin Console.
10. Create two Send Ports with File Adapter. These two Ports will then be used by two parties to route the message to the corresponding Folder.

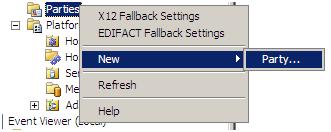
11. In Admin Console, right click the Parties Node and Select new Party.
12. In the General Tab you can add any Name Value Pairs.

13. In the Send Ports Tab, Add Party1 Send Port which is created in step 10 and Click OK to complete the step.

14. Expand the Party1 you just created and open the Party1_Profile. Go to Identity Tab and set the Identity as shown below.

Here the Qualifier is the same value that we gave in step 7.
What this means is, whenever the Name node of the input message has a value of Party1, it will be routed to the party we just created.
15. Repeat the same Steps and Create another Party named Party2.
16. Once the party creation is done, Refresh the Applications. This is important, else parties might not reflect in Configuration.
17. Right Click the Parties Application in Admin Console and Click Configure. Create a new Receive port (File Adapter) for the Logical Port of the Orchestration.

18. Select the Role_1 Tab. Click on Enlist and select the two parties you created in previous steps.
19. Now select Party1 and Click on Bind. Select the Party1 Send Port available for Party1.

20. Repeat the Same step and Bind the Party2. Complete the Configuration and Start the Application.
Testing the Parties:
1. Drop the below file in the Receive Location Folder of the Application.
<ns0:Root xmlns:ns0=”http://Parties.Schema1“>
<ID>ID_0</ID>
<Name>Party2</Name>
</ns0:Root>
2. Here Name node has the value Party2. It will mach this value with SomeId Key for the two Parties. Since the Party Party2 has SomeId value set to Party2, this file will be send to the send port linked with Party2.
3. If the Name node has a Value Party1, the file will be sent to the Send Port linked with Party1.
No comments:
Post a Comment